

Or where the words change AND move like with direct, indirect, and double object pronouns.
I make a powerpoint that teaches my students what words change, what they change to, and where those pronouns move to.
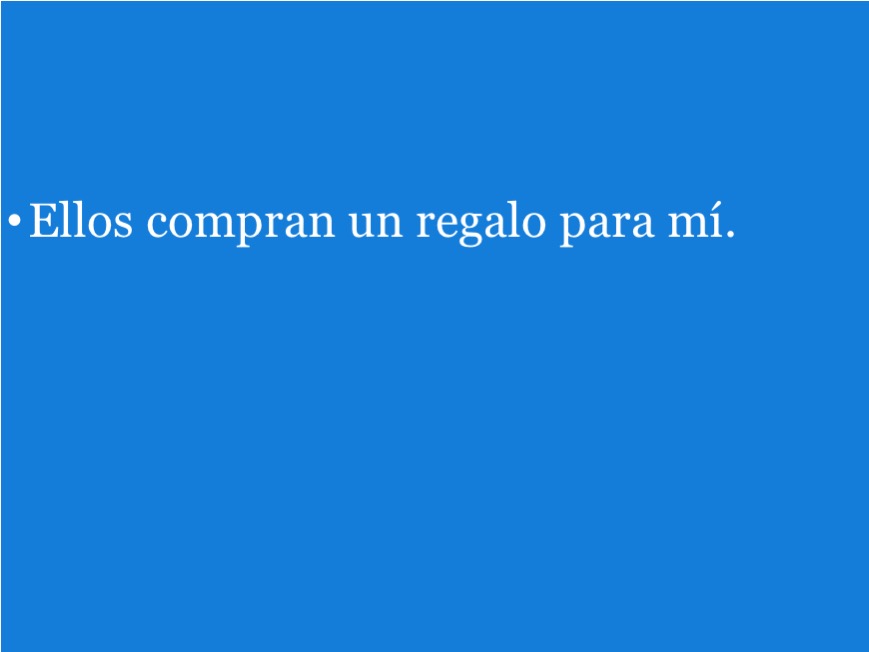
Like this:

Students not only see the direct and indirect objects convert to pronouns, but then they see the sentence rewritten with the pronouns in their correct spots.
I use this powerpoint (and powerpoints like it) to introduce direct, indirect, and double object pronouns.
And if you'd like to know how I made this magic happen (so you can make it happen in your class for this or other topics), then here you go!
How to Make an Animated Powerpoint
Again, I'm going to focus on my double object pronouns example, but you can take these skills and apply them to other topics.
1. Open up Powerpoint.
I know this seems obvious, but... just in case.
2. Format your slide.
Add colors, add text, make the font size at least 40 because anything less than that is too small to read from the back of the classroom. I have very strong feelings about font sizes.
For this example, my slide only has the sentence I'm going to use to demonstrate double object pronouns to my students.
3. Make each word or phrase its own text box.
In this example, you need to create a text box for:
- Ellos
- compran
- un regalo
- para mí.

4. Line up the individual word/phrase text boxes over the original sentence.

5. Make "el regalo" get crossed out and add the text box "lo".
Copy and paste the "el regalo" text box, so there are now 2 of them.
Click the cross out for the duplicate "el regalo" text box so it's el regalo.
Create a new text box and type "lo". Change the font color, background or outline if you wish.

6. Add animation for "el regalo", "el regalo", and "lo".
Click on the animation tab at the top of PowerPoint.
Click "Animation Pane".
Click on the "el regalo" text box and click Exit Effects. Choose Disappear.
Click on the "el regalo" text box and click Appear as an entrance effect.
Click on the "lo" text box and choose an entrance effect you like. I like Fly In.
In the Animation Pane, click "el regalo" and click the Timing dropdown. You want it set to On Click.
Click "el regalo" and click the Timing dropdown. Choose With Previous for Start.
Click "lo" and click the Timing dropdown. Choose After previous for Start. It will automatically fly in from the bottom, click the Effect Options dropdown if you want it to fly in from a side or the top. You can also change how fast or slow it flies in under Timing.
Go to View > Slide Show to see if it's animated how you like it. If it is, drag "el regalo" so it perfectly covers "el regalo". Drag "lo" to where you want it to appear.

7. Repeat steps 5 and 6 with "para mí".
Duplicate "para mí". Cross out the duplicate.
Make a "me" text box. Change the font, background, outline as needed.
Add the same animations and timing as with "el regalo", "el regalo", and "lo".
Go to View > Slide Show to make sure it looks how you want it to look.

8. Make the "me" and "lo" text boxes move just behind "ellos".
Click the "me" text box.
Click Path Animation in the Animation ribbon. Choose Draw Line.
Click and hold the "me" textbook and drag to the o or m in the "compran" text box. Let go and it'll show you the animation. Click and drag the yellow circle in the target "me" text box so it lands exactly where you want it.

Do the same with "lo". Click Path Animation and choose Draw Line. Click on the "lo" text box and drag it to where you want it to land. Drag the yellow circle so it lands exactly where you want it.
Click on the animation pane and click "lo". Click the Timing dropdown and change it to With Previous.
Go to View > Slide Show and make sure both pronouns move exactly where you want them to be. Move anything if you need to.
9. Make "un regalo" and "para mí." disappear.
Click on the "un regalo" text box and click Exit Effects in the animation ribbon. Choose Dissolve Out.
In the animation pane, click Timing for "un regalo" and choose With Previous for Start.
Do the same for the "para mí." text box. Add a Dissolve Out exit effect and change the timing to With Previous.
Go to View > Slide Show and make sure the animations do what you want so far.

10. Move the "compran" text box to make room for the pronouns.
Give it the same animation as the pronouns in Step 8. Click on the "compran" text box and click on Path Animation in the Animation Pane. Choose Draw Line. Drag the line to the right where you want "compran" to land.
Click on the animation pane and click "compran". Click the Timing dropdown and change it to With Previous.
Go to View > Slide Show and make sure everything moves where you want it to.

11. You're done! Unless...
you want to make this animation with an indirect object pronoun that changes to "se".
Click on the indirect object pronoun ("me" in this example, but in a different example it would be "le" or "les") and click Exit Effects in the animation ribbon. Choose Disappear. Change the Timing in the animation pane to After Previous.
Make a "se" text box. Place it exactly where you want it to show up. Click on Appear in the animation ribbon and change the timing to With Previous.

How to Make an Animated Google Slides
If you already have the powerpoint made, you can upload it to your Google Drive.
It won't keep all the animations the same - Google Slides doesn't have Path Animation (dear Google, please get on that, thanks). But we can work around that. If you're not creating the Google Slides from scratch, then skip down to Step 5.
1. Open Google Drive and create a new Google Slides.
Just want to make sure we're on the same page.
2. Follow steps 2-5 from above.
In order to make a crossed-out "un regalo", click on the text box, and go to Format > Text > Strikethrough.
3. Add animation for "el regalo", "el regalo", and "lo".
Right-click the "un regalo" text box. Click Animate. The Motion pane will appear on the right. Change the animation to Disappear. Slide the yellow time bar all the way to the right so it's 0.0 seconds.
Click the "un regalo" text box. Click Add Animation in the Motion pane. Change the animation to Appear and With Previous. Slide the yellow time bar all the way over to the right so it's 0.0 seconds.
Click the "lo" text box and add the Fly In From Bottom animation. Change the timing to After Previous.
Go to View > Present to make sure your animations are set correctly. If they are, drag "el regalo" so it perfectly covers "el regalo". Drag "lo" to where you want it to appear.

4. Add the same animations for "para mí", "para mí", and "me".
Make "para mí" disappear on click at 0.0 seconds, followed by "para mí" appearing at the same time at 0.0 seconds. Make "me" fly in after the "para mí" switch.
Go to View > Present again to make sure it all looks right. Make "para mí" cover "para mí".

5. Fake the movement animation.
Google doesn't have path animation (rude), so we have to fake it with disappearing and appearing animation.
Copy and paste the "me" and "lo" text boxes. Place them next to "ellos".
Click on the new "me" text box. Add the Appear animation. Keep it On Click and drag the yellow time bar all the way over to the right to 0.0 seconds.
Do the same with the new "lo" text box, but make it With Previous and 0.0 seconds.
Click on the first "me" text box. Add the Disappear animation, With Previous, and 0.0 seconds.
Do the same with the first "lo" text box.
Go to View > Present to make sure it's animated properly.

6. Make "un regalo" and "para mí." disappear.
Click on the "un regalo" text box and add the animation Fade Out. Make it With Previous and 0.0 seconds.
Do the same for "para mí".
Go to View > Present and make sure the animations do what you want so far.

7. Move the "compran" text box to make room for the pronouns.
Fake its animation the same way as above with the pronouns. Copy and paste the "compran" text box, and place the new one to the right of "lo".
Add the Disappear animation With Previous and 0.0 seconds for the first "compran" text box.
Add the Appear animation With Previous and 0.0 seconds for the new "compran" text box.
Go to View > Present and make sure the animations are exactly what you want.

And there you have it! Now your powerpoints and Google Slides can have amazing and magical animations.
What topics would you use these tricks with? Let me know in the comments! 👇


No comments
Post a Comment